 Save to Pinterest
 One Saturday afternoon, my niece declared she wanted to help make "fancy candy" for her friend's birthday. We had half a package of Oreos and a block of cream cheese sitting in the fridge, and honestly, I had no grand plan. What started as a spontaneous kitchen experiment turned into the kind of treat that had neighbors texting me for the recipe by Monday morning. The bright pink coating wasn't just pretty—it cracked with a satisfying snap that made every bite feel like unwrapping a tiny present.
I still remember the first batch we made together, how my niece giggled every time a truffle plopped into the pink candy melt and emerged looking like a shiny marble. She insisted on adding edible pearls to each one, turning our countertop into what looked like a very delicious jewelry workshop. When her friends saw the tray at the party, they lined up like it was a candy store opening. That's when I realized these weren't just truffles—they were little moments of joy wrapped in pink.
Ingredients
- Oreo cookies: The entire cookie goes in, filling and all, which is what gives these truffles their signature chocolate flavor and speckled appearance when you break them open.
- Cream cheese: It must be at room temperature or it won't blend smoothly with the crumbs, leaving you with lumpy, sad truffle mixture that refuses to hold its shape.
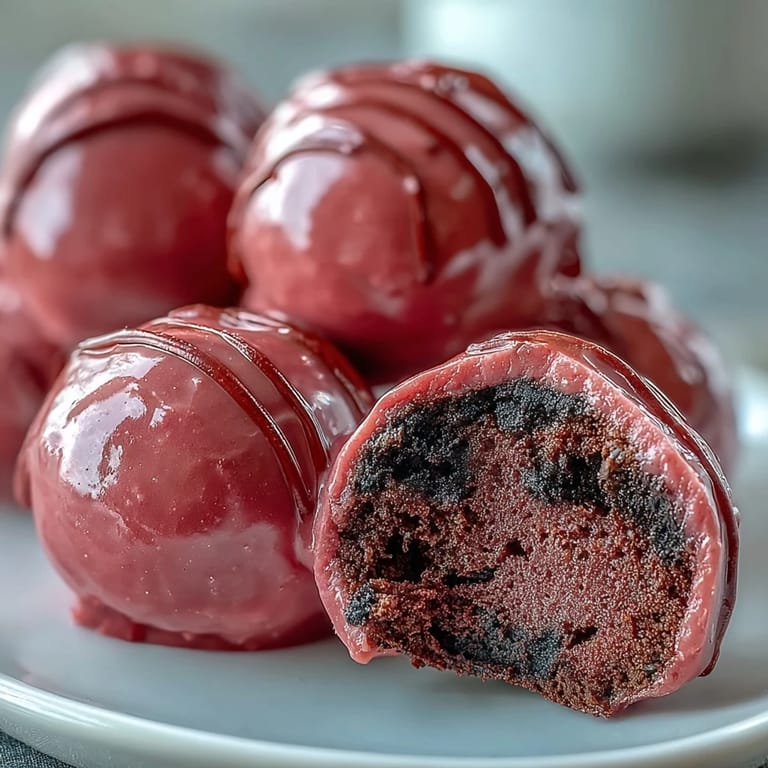
- Pink candy melts: These are your magic shell, and the oil based coloring is crucial if you're tinting white melts yourself because water based dyes will seize the candy into a gritty mess.
- Vegetable shortening: Just a teaspoon makes the coating glossy and smooth, turning your truffles from homemade looking to bakery window gorgeous.
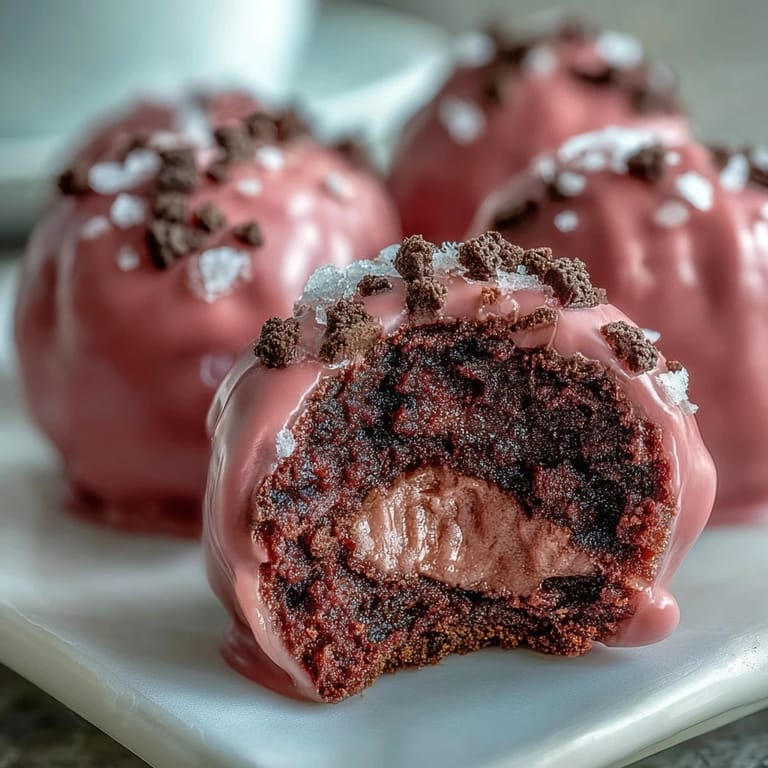
- Sprinkles or edible pearls: Totally optional, but they transform plain pink spheres into something that makes people stop and stare before they even taste one.
Tired of Takeout? 🥡
Get 10 meals you can make faster than delivery arrives. Seriously.
One email. No spam. Unsubscribe anytime.
Instructions
- Crush the cookies:
- Pulse the Oreos in a food processor until they look like dark, fragrant sand, or seal them in a bag and smash them with a rolling pin if you need to release some tension. Either way, you want fine crumbs with no big chunks hiding in there.
- Mix the base:
- Stir the softened cream cheese into the cookie crumbs with a sturdy spatula, working it until the mixture turns uniform and slightly sticky. It should look like wet sand that holds together when you squeeze it in your palm.
- Roll the truffles:
- Scoop tablespoon sized portions and roll them between your hands into smooth, tight balls, placing each one on a parchment lined baking sheet. If the mixture sticks to your palms, dampen your hands very lightly with water.
- Chill them down:
- Pop the tray into the refrigerator for 30 minutes or the freezer for 15, because warm truffles will fall apart the second they hit warm candy coating. You want them firm enough to handle confidently.
- Melt the candy:
- Heat the pink candy melts in a microwave safe bowl in 30 second bursts at medium power, stirring between each one until the mixture is completely smooth and glossy. Stir in the vegetable shortening if you want that professional candy shop shine.
- Dip and coat:
- Use a fork to lower each chilled truffle into the melted candy, rolling it gently to coat all sides, then lift it out and tap the fork against the bowl's edge to shake off the excess. Set it back on the parchment lined sheet and move quickly before the coating starts to set.
- Decorate immediately:
- While the candy shell is still wet and tacky, sprinkle on your decorations or press edible pearls gently into the surface. Once it hardens, nothing will stick, so don't wait.
- Let them set:
- Allow the coated truffles to firm up at room temperature for about 20 minutes, or speed things up by chilling them in the fridge for 10 to 15 minutes. The coating should feel hard and smooth to the touch.
- Serve and store:
- Keep the finished truffles chilled until you're ready to serve, and store any leftovers in an airtight container in the refrigerator for up to a week. They taste best cold, when the coating snaps cleanly and the center is firm and creamy.
 Save to Pinterest
 The batch we made for that birthday party disappeared so fast that my niece asked if we could make them again the next weekend, just for us. We did, and we sat at the kitchen table with a plate of pink truffles and cold milk, talking about nothing in particular while the late afternoon sun came through the window. It wasn't fancy or planned, but it became one of those small, perfect kitchen moments I didn't know I needed until it happened.
Making Them Your Own
The beauty of these truffles is how easily they adapt to whatever's happening in your life or your pantry. Swap the pink candy melts for red at Valentine's Day, pastel blue for a baby shower, or even white with gold shimmer for New Year's Eve. I've stirred mini chocolate chips into the filling, rolled them in crushed nuts before the coating sets, and even drizzled contrasting colored candy over the top in thin lines. One friend added a tiny drop of peppermint extract to the cream cheese mixture and dipped them in dark chocolate, and they tasted like those fancy peppermint bark candies from expensive chocolate shops.
What to Expect
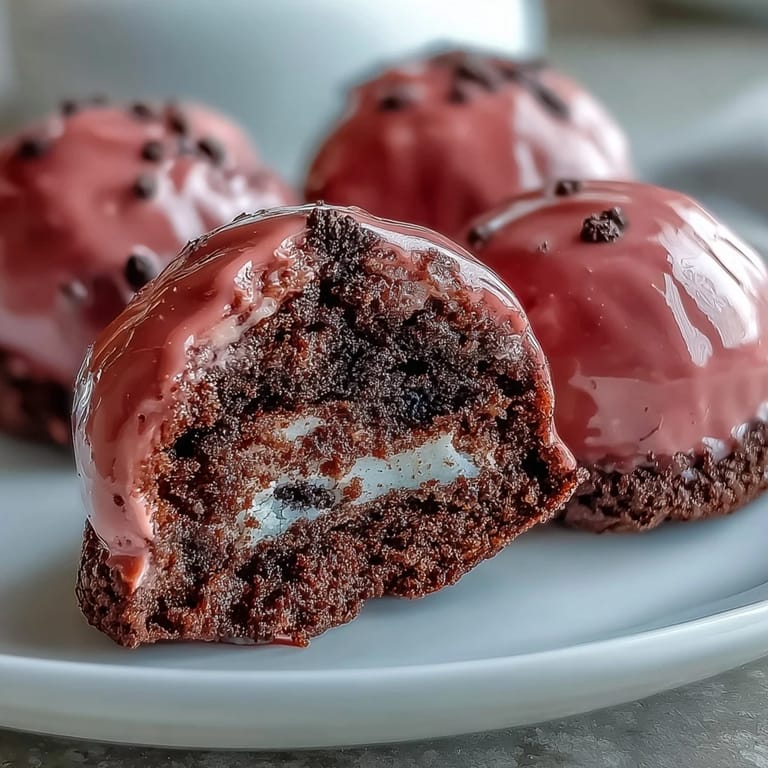
When you bite into one of these, the candy shell should crack cleanly, not bend or feel waxy. The center will be dense and creamy, with tiny specks of dark Oreo cookie visible throughout, almost like cookies and cream ice cream in truffle form. They're rich, so one or two is usually enough to satisfy a sweet craving, which is perfect because a batch makes three dozen and you don't want to eat them all in one sitting. The texture is smooth and cold from the fridge, and the sweetness is balanced by the slight tang of the cream cheese, which keeps them from feeling cloying.
Troubleshooting and Storage
If your truffles develop cracks in the coating after they set, it usually means the candy melts cooled too quickly or the truffles were too cold when dipped. Let them sit at room temperature for a few minutes before dipping next time, and make sure your melted candy isn't too hot or too thick. Store them in a single layer if possible, or separate layers with parchment paper so they don't stick together. They'll keep in the fridge for up to a week, though in my experience they rarely last more than three days once people know they're in there.
- If the coating slides off during dipping, your truffles weren't chilled long enough or your candy melt is too thin.
- Candy melts that harden too fast can be rewarmed gently in 10 second bursts to bring them back to dipping consistency.
- Don't stack the finished truffles until the coating is completely firm, or you'll end up with pink smudges and stuck together clusters.
 Save to Pinterest
 These truffles have become my go to whenever I need something sweet, simple, and a little bit special without spending hours in the kitchen. They're proof that you don't need fancy techniques or expensive ingredients to make people smile, just a willingness to get a little messy and have some fun.
Common Questions
- → Can I use regular chocolate instead of candy melts?
Yes, you can use tempered chocolate for coating, though candy melts are easier to work with and don't require tempering. If using chocolate, add a teaspoon of coconut oil or shortening to help it flow smoothly.
- → How do I prevent the coating from cracking?
Make sure your truffle balls are very cold before dipping and work quickly. The temperature difference between cold filling and warm coating can cause cracking, so let chilled truffles sit at room temperature for 2-3 minutes before dipping.
- → Can I make these ahead of time?
Absolutely. These truffle balls store beautifully in an airtight container in the refrigerator for up to one week, making them perfect for advance party preparation or gift-giving.
- → What if I don't have a food processor?
Place the cookies in a sealed zip-top bag and crush them with a rolling pin until fine crumbs form. This method works just as well, though it takes a few extra minutes of effort.
- → Can I use different Oreo flavors?
Yes, feel free to experiment with different Oreo varieties like Golden Oreos, Mint Oreos, or Peanut Butter Oreos to create unique flavor combinations. Just maintain the same quantity by weight.
- → Why add vegetable shortening to the candy melts?
Vegetable shortening thins the melted candy coating, creating a smoother consistency that's easier to work with and results in a thinner, more professional-looking shell with better shine.