 Save to Pinterest
 My roommate challenged me to make a dessert that tasted indulgent but wouldn't derail my gym routine, and honestly, I was skeptical until I whisked Greek yogurt with cocoa powder one quiet Sunday morning. The transformation was immediate—what started as thick and tangy became this cloud-like mousse that felt more like a treat than fuel. I've been making it ever since, sometimes on autopilot before a long week, sometimes with extra care when friends are coming over.
I brought a batch to a book club once, and someone asked if it was homemade or from a fancy bakery—that moment made the whole thing worth it. Watching people expect something complicated and discovering it takes barely any time feels like sharing a small secret.
Ingredients
- Greek yogurt (1 1/2 cups): The creamy backbone that stays tangy enough to balance the cocoa, so don't skip the full-fat versions if you can find them.
- Cold milk (1/2 cup): This loosens everything up and helps the mixer actually do its job without the mixture being stubborn.
- Protein powder (2 scoops): Chocolate blends seamlessly, but unflavored works if you want the cocoa to shine and you're experimenting with other flavors.
- Unsweetened cocoa powder (2 1/2 tbsp): The quality here matters—cheap cocoa tastes dusty, so invest in something you'd actually want to bake with.
- Maple syrup or honey (2-3 tbsp): Adjust based on how sweet your protein powder already is and whether you're tasting as you go.
- Vanilla extract (1 tsp): A small amount that somehow makes the chocolate taste richer and less one-dimensional.
- Fine sea salt (1/4 tsp): Trust this even if it seems odd—it's the whisper that makes people pause and ask what's in it.
Tired of Takeout? 🥡
Get 10 meals you can make faster than delivery arrives. Seriously.
One email. No spam. Unsubscribe anytime.
Instructions
- Combine everything in one bowl:
- Whisk the Greek yogurt, cold milk, protein powder, cocoa powder, maple syrup, vanilla, and fine sea salt together until there are no lumps and the color is even throughout. This takes about a minute of focused whisking and is honestly meditative.
- Beat it into clouds:
- Switch to a hand mixer or stand mixer and run it on medium-high for 2-3 minutes until the mousse transforms into something light and airy that looks almost doubled in volume. You'll hear the difference—it goes from wet sounds to this whisper-light churning.
- Taste and tweak:
- This is non-negotiable because sweetness is personal and some protein powders are sneaky about their own sweetness. A tiny spoon of extra maple syrup or a pinch more salt can make all the difference.
- Spoon into glasses:
- Divide the mousse among serving bowls or glasses, and here's where it looks elegant without any effort on your part.
- Chill or serve:
- If you have 30 minutes, the texture becomes even more mousse-like and holds its shape beautifully. If you're hungry now, it's still fluffy and delicious fresh from the mixer.
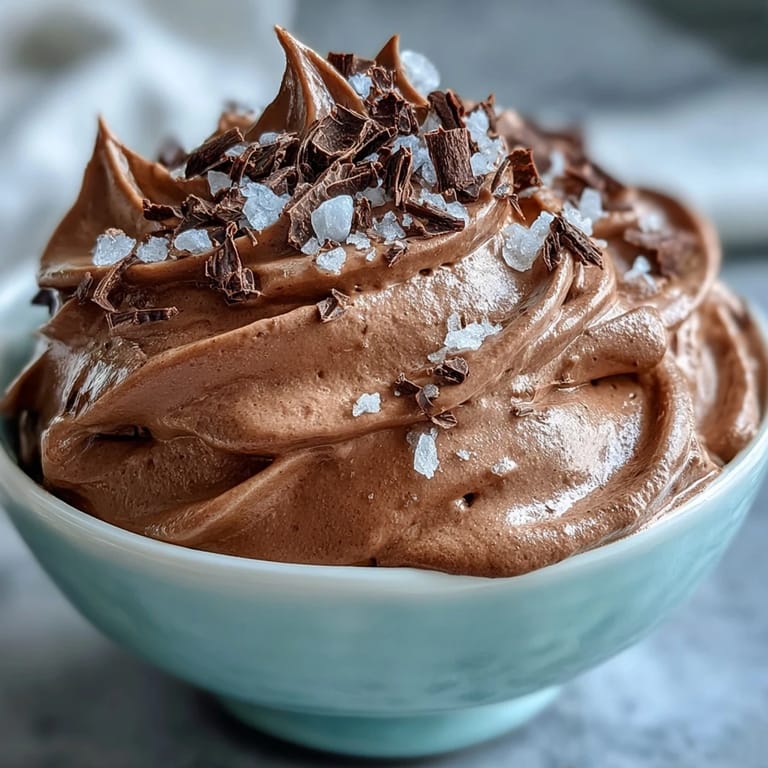
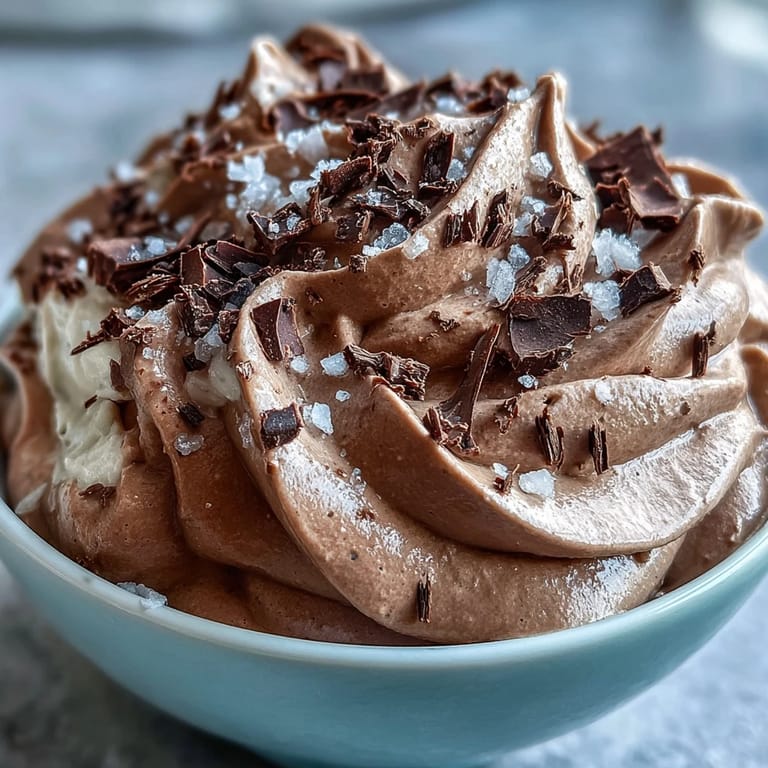
- Top with intention:
- A pinch of flaky sea salt, some shaved dark chocolate, or fresh berries right before serving turns this from simple into something you'd order at a café.
 Save to Pinterest
 There was this one afternoon when I made this for myself after a rough day, and I sat on my kitchen counter with the bowl and just ate slowly, tasting every layer of cocoa and salt and sweetness. It reminded me that sometimes the best comfort isn't complicated.
The Texture Secret
The real magic happens in those 2-3 minutes of mixing—you're not just combining ingredients, you're actually incorporating air that makes the mousse feel lighter than it has any right to be given how much protein is in it. I learned this the hard way by under-mixing once and ending up with something that tasted fine but felt heavy, almost custard-like. Now I listen for the sound to change and watch the volume actually increase before I stop.
Playing With Flavors
The base is chocolate, but it's also a canvas if you're feeling adventurous. I've stirred in espresso powder for a mocha version, orange zest for something brighter, and even a tiny bit of peppermint extract when December rolled around. Each version tastes like the same recipe but somehow completely different.
When You Want It Even Fancier
If you really want to transform this into something that feels restaurant-level, there are a few moves that make people think you're showing off. The optional additions here aren't just garnish—they're the difference between something simple and something memorable.
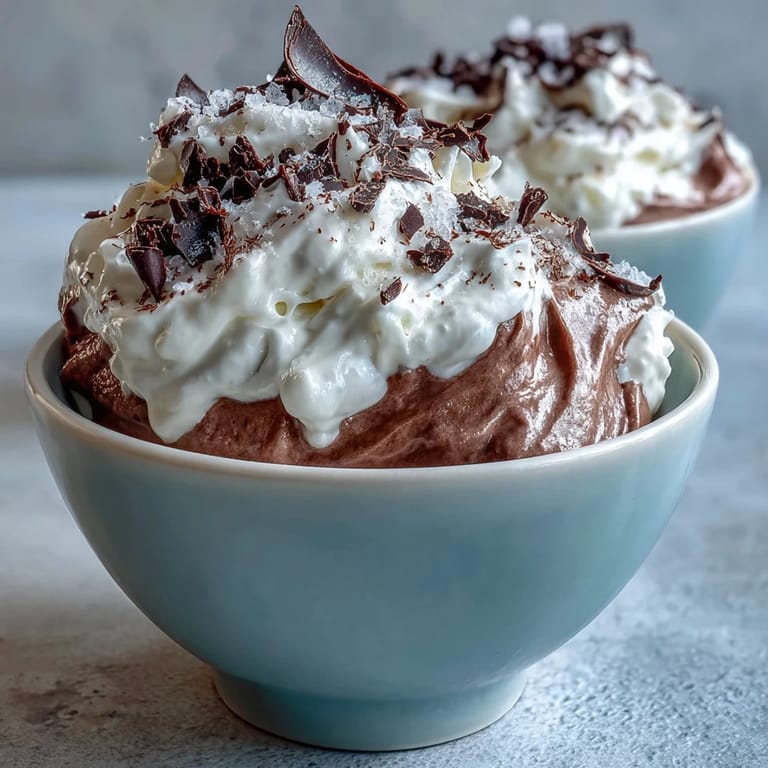
- Fold in whipped cream or whipped coconut cream after beating for a mousse so airy it barely exists on your spoon.
- Layer it with crushed dark chocolate cookies or granola in a glass so each spoonful has texture and surprise.
- Serve it alongside a small espresso or a sip of something rich like ruby port to make it an actual dessert moment.
 Save to Pinterest
 This mousse sits in that perfect middle ground between indulgence and practicality, which is why it's become my answer to almost every dessert craving. Make it once and you'll understand why.
Common Questions
- → How do I achieve a fluffy texture?
Whisk the mixture on medium-high speed for 2–3 minutes until light and airy. Folding in whipped cream can enhance fluffiness.
- → Can I use non-dairy milk?
Yes, unsweetened non-dairy milk works well to maintain the light texture without overpowering flavors.
- → What protein powders work best?
Whey or plant-based protein powders, either chocolate or unflavored, blend smoothly and complement the cocoa flavor.
- → Is chilling necessary?
Chilling for at least 30 minutes improves texture, but the mousse can be enjoyed immediately for a softer consistency.
- → How can I adjust sweetness?
Adjust maple syrup or honey to taste before whisking, ensuring a balanced flavor that suits your preference.