 Save to Pinterest
 I stumbled upon this technique during a dinner party emergency when my planned main fell apart. A whole cauliflower sat innocently in my vegetable basket, and I decided to get creative with whatever cheese I had on hand. The kitchen filled with this incredible aroma as it roasted, and my guests actually hovered around the oven watching it turn golden. Now it is the dish everyone requests when they come over, and I love how something so simple creates such a dramatic presentation.
Last winter my sister declared she was tired of the same old roasted vegetables, so I served this as the centerpiece of our Sunday dinner. She took one bite, eyes widened, and immediately asked for the recipe. Now whenever we have family gatherings, this cauliflower appears on the table, and even the skeptical carnivores go back for seconds. There is something deeply satisfying about turning a humble vegetable into something that feels indulgent and special.
Ingredients
- 1 large whole cauliflower: Choose a head that feels heavy and tight with no browning or loose florets popping off
- 1 tbsp olive oil: This helps the exterior develop that gorgeous golden color and adds subtle richness
- ½ tsp salt: Essential for drawing out the cauliflower natural sweetness as it roasts
- ¼ tsp black pepper: Freshly cracked gives the best warm spicy undertone
- 150 g cream cheese: Must be fully softened to prevent lumpy filling and ensure smooth stuffing
- 100 g shredded mozzarella cheese: Creates those incredible cheese pulls when you cut into the center
- 50 g grated Parmesan cheese: Adds a salty sharp depth that balances the cream cheese perfectly
- 2 tbsp chopped fresh chives: Their mild onion flavor brightens all that rich cheese
- 1 garlic clove: Mince it finely so no one bites into a sharp chunk
- ½ tsp smoked paprika: This is the secret ingredient that makes people ask what is in it
- ¼ tsp ground nutmeg: Just a pinch adds warmth without making it taste like dessert
- 1 tbsp milk: Helps loosen the filling to the perfect stuffable consistency
- 50 g shredded cheddar cheese: Forms that irresistible golden crust on top
- 2 tbsp breadcrumbs: Use gluten-free if needed, they add essential crunch
- 1 tbsp melted butter: Toss it with the breadcrumbs so they brown evenly
Tired of Takeout? 🥡
Get 10 meals you can make faster than delivery arrives. Seriously.
One email. No spam. Unsubscribe anytime.
Instructions
- Preheat and prep your workspace:
- Heat your oven to 200°C and line a baking tray with parchment paper for easy cleanup later.
- Get the cauliflower ready:
- Trim off the outer leaves and slice just enough from the base so it sits flat without falling apart.
- Par-boil the cauliflower:
- Drop it into a large pot of salted boiling water for 8 to 10 minutes until fork-tender but not falling apart.
- Whip up the cheesy filling:
- Mash together the cream cheese, mozzarella, Parmesan, chives, garlic, smoked paprika, nutmeg, and milk until completely smooth.
- Create stuffing pockets:
- Use a small knife to cut deep into the base and between florets while keeping the cauliflower head intact.
- Stuff it generously:
- Press the cheese mixture into every crevice and the center cavity, really working it in with your fingers.
- Season the exterior:
- Brush the entire outside with olive oil and sprinkle evenly with salt and pepper.
- Add the crispy topping:
- Mix cheddar, breadcrumbs, and melted butter then scatter it over the top.
- Roast until golden:
- Bake for 40 to 45 minutes until the cheese is bubbling and the surface has turned deep golden brown.
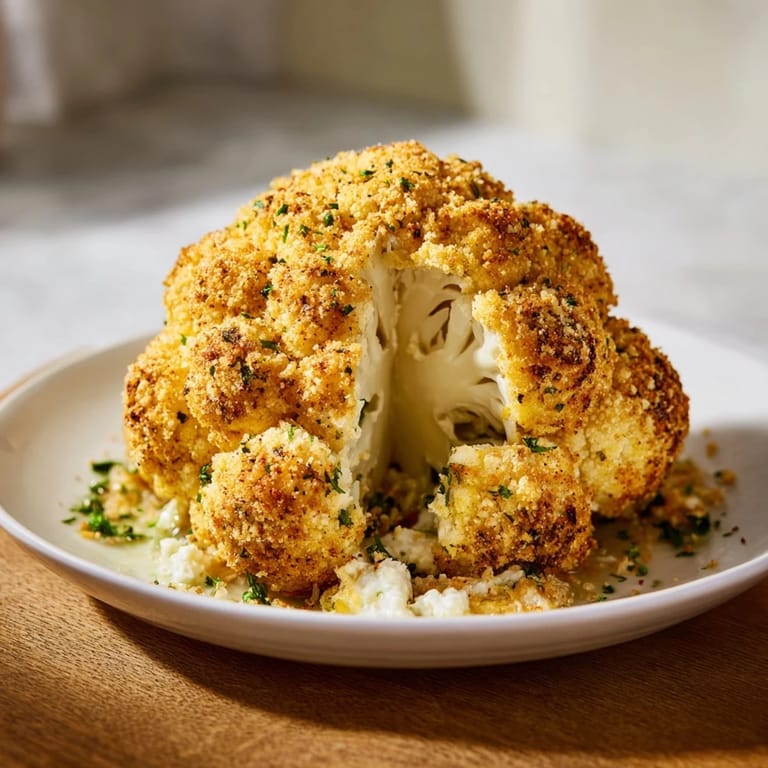
- Rest before serving:
- Let it sit for 5 minutes so the cheese sets slightly, then slice into wedges like a cake.
 Save to Pinterest
 My husband initially scoffed at cauliflower for dinner but after one bite he admitted it was actually better than the lasagna he had been craving. Now he asks when I am making the cheese cauliflower again, and I love watching guests reactions when I bring it to the table whole and golden. Food that brings this much joy to the table is what cooking is really about.
Make It Your Own
I have found that sun-dried tomatoes packed in oil add a lovely tangy sweetness that cuts through all the cheese. Sometimes I fold in sautéed mushrooms for an earthier version or add chopped spinach for extra color. The filling base is incredibly forgiving, so use whatever cheese combination you love or need to use up.
Serving Suggestions
A crisp green salad with a sharp vinaigrette balances the richness beautifully. Roasted vegetables like carrots or Brussels sprouts on the same tray make it a complete meal. For a heartier spread, serve alongside crusty bread to soak up any melted cheese that escapes.
Storage and Reheating
Leftovers keep remarkably well in an airtight container in the refrigerator for up to 3 days. Reheat in a 180°C oven for about 15 minutes until hot and bubbly again. The microwave works but will make the topping soggy, so I only use that method when absolutely necessary.
- Freezing is not recommended as the texture becomes watery
- Bring to room temperature before reheating for even heating
- The flavors actually develop more after a night in the fridge
 Save to Pinterest
 Every time I make this, I am reminded that the simplest ingredients treated with a little care can become something extraordinary. Hope your kitchen fills with as much warmth and joy as mine does when this comes out of the oven.
Common Questions
- → How do I know when the cauliflower is done?
The cauliflower is ready when it's golden brown on top, the cheese is bubbling, and a knife inserted into the center meets no resistance. This usually takes 40-45 minutes at 200°C.
- → Can I prepare this ahead of time?
Yes! You can blanch the cauliflower and prepare the cheese filling up to a day in advance. Store them separately in the refrigerator, then assemble and bake when ready to serve.
- → What can I use instead of cream cheese?
You can substitute with mascarpone, ricotta cheese, or a combination of Greek yogurt and shredded cheese for a tangier variation. Just adjust the milk to achieve a spreadable consistency.
- → How do I cut and serve this?
Let the roasted cauliflower rest for 5 minutes after baking. Use a sharp knife to cut it into wedges like a cake, starting from the center and working outward. Serve warm while the cheese is still melted.
- → Can I make this dairy-free?
Absolutely! Use vegan cream cheese, dairy-free shredded cheese alternatives, and nutritional yeast for the cheesy flavor. Coconut oil or vegan butter works perfectly for the topping.
- → Why do I need to blanch the cauliflower first?
Blanching ensures the cauliflower becomes tender throughout during the roasting time. Without this step, the exterior might burn before the inside is fully cooked.