 Save to Pinterest
 Late one Tuesday, my roommate caught me standing at the counter with a spoon in one hand and a jar of peanut butter in the other, debating whether to just eat it straight or make something real. That's when I remembered this mug cake trick I'd learned during exam week years ago. Two minutes later, I had a warm, fluffy dessert that tasted like I'd actually tried, and she immediately demanded the recipe.
I made this for my neighbor once when she mentioned she was having a rough day. She texted me an hour later asking if I'd somehow baked a full cake and just given her a slice, because she couldn't believe something that good came from a microwave. Now she keeps a jar of peanut butter at her desk specifically for emergency mug cake situations.
Ingredients
- Creamy peanut butter: This is the flavor backbone, so use one you actually like eating by the spoonful. Natural peanut butter works but makes the cake a bit denser and less sweet.
- Unsalted butter, melted: Adds richness and helps the cake stay moist. If you only have salted butter, skip the pinch of salt in the dry ingredients.
- Large egg: Binds everything together and gives the cake structure. Make sure it's at room temperature so it mixes smoothly with the peanut butter.
- Milk: Any kind works here, dairy or non-dairy. It loosens the batter just enough to keep the cake from turning into a hockey puck.
- Vanilla extract: A small amount goes a long way in rounding out the peanut butter flavor and adding warmth.
- All-purpose flour: Just three tablespoons create the right amount of structure without making it cakey in a bad way.
- Granulated sugar: Sweetens the cake and helps it brown slightly on top. You can reduce it by half if you prefer less sweetness.
- Baking powder: The magic ingredient that makes the cake rise and get fluffy in under two minutes.
- Salt: A tiny pinch balances the sweetness and makes the peanut butter flavor pop.
Tired of Takeout? 🥡
Get 10 meals you can make faster than delivery arrives. Seriously.
One email. No spam. Unsubscribe anytime.
Instructions
- Mix the Base:
- Drop the peanut butter and melted butter into your mug and stir them together until they're smooth and glossy. This takes about 20 seconds with a fork.
- Add the Wet Ingredients:
- Crack in the egg, pour in the milk and vanilla, then whisk everything with a fork until it's completely blended. The mixture should look pale and a little frothy.
- Fold in the Dry Ingredients:
- Sprinkle the flour, sugar, baking powder, and salt over the wet mixture, then stir gently until you don't see any dry streaks. Stop stirring as soon as it's combined or you'll end up with a tough cake.
- Microwave:
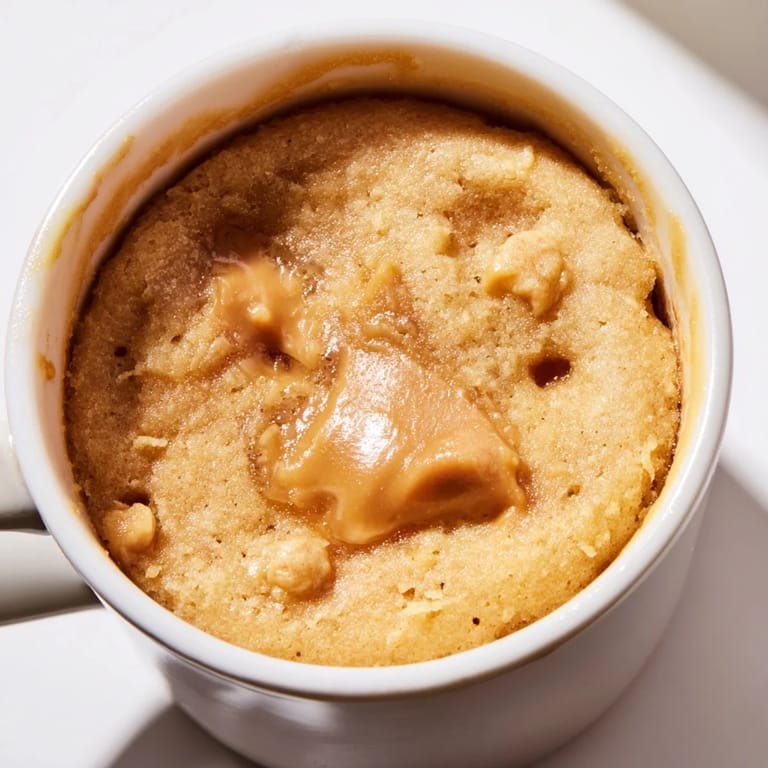
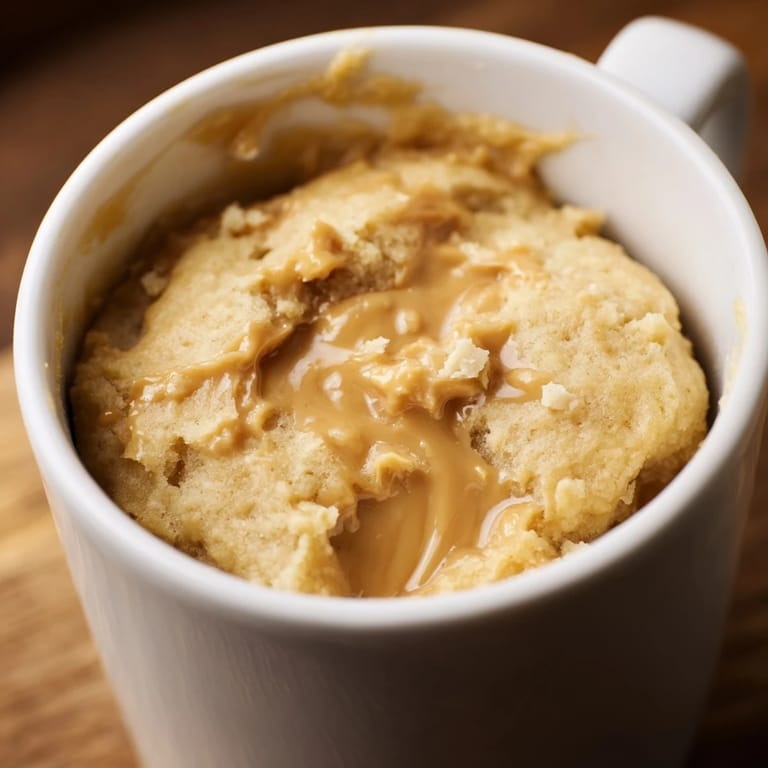
- Pop the mug in the microwave and cook on high for 60 to 75 seconds, depending on your microwave's strength. The cake will rise up dramatically and the center should look just set, not wet.
- Cool and Enjoy:
- Let it sit for a minute or two so you don't burn your tongue. Then grab a spoon and dig in straight from the mug.
 Save to Pinterest
 The first time I made this for my little cousin, she watched the mug through the microwave door like it was a science experiment, gasping every time it puffed up higher. When I handed it to her with a spoon, she took one bite and declared me a wizard. It's been her birthday breakfast request three years running.
How to Avoid a Rubbery Texture
The biggest mistake people make is overcooking. Microwave wattages vary wildly, so start with 60 seconds and check it. The top should look dry and the edges should pull away slightly from the mug, but the center can still look a tiny bit glossy. It will finish cooking as it sits. If you cook it until the center is totally matte, you've gone too far and it'll be chewy instead of fluffy.
Flavor Variations Worth Trying
I've stirred mini chocolate chips into the batter before microwaving and they melt into gooey pockets of chocolate. A drizzle of honey or maple syrup on top adds a nice contrast to the peanut butter richness. One time I swirled in a spoonful of raspberry jam before cooking and it tasted like a peanut butter and jelly sandwich in cake form. You can also swap the peanut butter for almond butter or cashew butter if you want a different nut flavor.
Storage and Reheating Tips
Honestly, this is best eaten fresh, but if you have leftovers you can cover the mug with plastic wrap and refrigerate it for up to two days. Reheat it in the microwave for 15 to 20 seconds to bring back some of the softness. It won't be quite as fluffy as when it's fresh, but it's still pretty good with a scoop of ice cream melting into it.
- If you're making it ahead, mix the dry ingredients in the mug the night before and just add the wet ingredients when you're ready to cook.
- You can double the recipe in a larger bowl and split it between two mugs for a quick dessert when a friend comes over.
- Try sprinkling a few flaky sea salt crystals on top right after microwaving for a sweet and salty finish.
 Save to Pinterest
 This little mug cake has saved me on more late nights than I can count, and it never feels like I'm settling for second best. It's proof that sometimes the simplest recipes are the ones you come back to again and again.
Common Questions
- → What type of peanut butter works best?
Creamy peanut butter provides a smooth texture and rich flavor that blends well into the batter.
- → Can I use non-dairy milk alternatives?
Yes, almond, oat, or other plant-based milks work well and keep the dessert vegetarian-friendly.
- → How do I avoid overcooking in the microwave?
Cook on high for 60-75 seconds and stop when the center is set but still moist, avoiding dryness.
- → What are good topping ideas for this cake?
Chocolate chips, honey drizzle, or a scoop of ice cream enhance texture and flavor without complicating preparation.
- → Is this suitable for gluten-free diets?
Substitute all-purpose flour with a 1:1 gluten-free blend to accommodate gluten sensitivities.