 Save to Pinterest
 My sister texted me three weeks before her graduation with a single emoji: a graduation cap. No pressure, right? But when she mentioned wanting something "cosmic and magical" for her celebration cake, I knew exactly what to do. I'd seen galaxy cakes online but never attempted one myself—until that moment when I decided to stop scrolling and start baking. The idea of swirling purples, teals, and blacks into a buttercream sky felt both terrifying and irresistible. Turns out, the galaxy cake isn't nearly as intimidating as it looks.
The day my sister saw that cake emerging from the kitchen, she literally gasped—and then did a little dance. Her friends gathered around like it was a museum piece, everyone snapping photos before anyone dared to cut into it. That's when I realized this cake isn't just dessert; it's a moment-maker, the kind of dish that becomes the story people tell later. Watching her blow out those candles surrounded by her galaxy cake felt like the perfect ending to four years of hard work.
Ingredients
- All-purpose flour (2 ½ cups): This is your cake's foundation, and measuring by weight keeps things consistent—no packed flour surprises.
- Granulated sugar (2 cups): Creaming it with butter creates air pockets that make the cake tender and light rather than dense.
- Unsalted butter (1 cup plus 1 ½ cups): Room temperature butter is non-negotiable; cold butter won't cream properly and your cake will suffer.
- Eggs (4 large, room temperature): Cold eggs seize the batter—let them sit out while you prep and they'll incorporate like silk.
- Whole milk (1 cup plus ¼ cup): The room-temperature milk prevents shocking your batter and keeps the crumb tender.
- Baking powder (2 ½ tsp): Double-check the expiration date; old baking powder is a silent cake-killer.
- Vanilla extract (1 tbsp plus 2 tsp): Use real vanilla if you can—it tastes noticeably better than imitation.
- Powdered sugar (5 cups, sifted): Sifting removes lumps and ensures your buttercream is silky smooth, not gritty.
- Gel food coloring (black, navy blue, purple, pink, teal): Gel holds its vibrancy far better than liquid food coloring, and you'll use less to get richer hues.
- Edible gold and silver star sprinkles: These are your finishing touch, so choose ones you actually like looking at.
Tired of Takeout? 🥡
Get 10 meals you can make faster than delivery arrives. Seriously.
One email. No spam. Unsubscribe anytime.
Instructions
- Prep your pans and preheat:
- Get your oven to 350°F and grease those three 8-inch pans, then line them with parchment paper—this prevents sticking and gives you something to grip when flipping. If you don't have three pans, you can bake in batches, though timing gets trickier.
- Cream the butter and sugar:
- Beat them together for at least 3 to 4 minutes until the mixture looks pale and fluffy, like clouds. This process incorporates air, which is what makes your cake light instead of compact.
- Add eggs one at a time:
- Drop each egg in and beat well before adding the next one; this prevents the mixture from breaking or looking separated. It might seem slow, but patience here pays off in texture.
- Mix in the vanilla:
- Just a quick stir, then move on to the dry ingredients.
- Combine dry ingredients separately:
- Whisk your flour, baking powder, and salt in another bowl so they're evenly distributed throughout. No lumpy pockets of baking powder means even rise.
- Alternate wet and dry mixtures:
- Start and end with flour, adding dry and wet in three additions each—this keeps the batter smooth and prevents overmixing. Overmixed batter leads to tough, dense cake, so stop as soon as you see no white streaks.
- Divide and bake:
- Split the batter evenly among the pans and smooth the tops slightly. Bake for 30 to 35 minutes until a toothpick comes out clean or with just a few moist crumbs.
- Cool properly:
- Let the cakes cool in their pans for 10 minutes—this allows them to set—then turn them out onto racks. Cooling completely before frosting prevents the buttercream from melting off.
- Beat the buttercream base:
- Softened butter beaten alone for a couple of minutes becomes creamy and pale, which is your secret to smooth buttercream. Then gradually add your sifted powdered sugar so you don't create a sugar cloud in your kitchen.
- Add milk and vanilla last:
- These loosen the mixture to spreadable consistency and add flavor depth. Beat until the whole thing looks fluffy and light.
- Divide and tint buttercream:
- Pour your divided buttercream into bowls and add gel coloring gradually—a tiny amount goes a long way, and you can always add more but never remove it.
- Create the galaxy swirl log:
- Lay out plastic wrap, drop spoonfuls of each color randomly on it, then roll it up into a loose log and snip the end. This creates a marbled effect when piped.
- Layer and crumb coat:
- Place the first cake on your plate, spread a thin layer of galaxy buttercream, repeat with the next layers. The crumb coat seals in crumbs so your final frosting looks pristine.
- Chill the crumb coat:
- Twenty minutes in the fridge sets that crumb coat and makes applying the final layer so much easier.
- Apply galaxy buttercream:
- Pipe and swirl your galaxy-colored buttercream all over the cake using gentle motions with an offset spatula—you're creating a marbled, organic look, not a smooth finish. Embrace the imperfect swirls; they look more galaxy-like anyway.
- Add painted stars:
- Dip a food-safe paintbrush in white gel coloring and flick it across the cake surface, or use a splatter tool for a more dramatic effect. Let your hand move naturally rather than planning each star.
- Finish with sprinkles and glitter:
- Scatter edible gold and silver stars across the top, then dust with edible glitter or luster dust for shimmer. Add a graduation cap topper if you'd like that extra celebratory touch.
 Save to Pinterest
 There's something magical about watching people's faces when they see this cake for the first time—that moment of "did you actually make this?" followed by the realization that yes, you really did. My sister's friends were messaging me weeks later asking if I'd make cakes for their weddings and parties, which felt surreal coming from a project I almost didn't attempt because it seemed too fancy.
Flavor Variations That Work
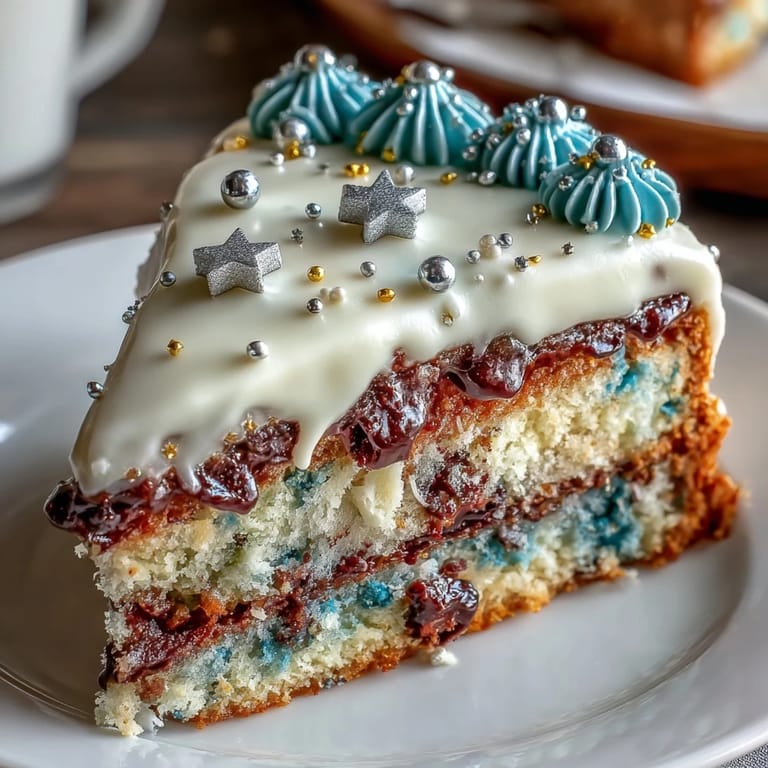
Once you nail the basic cake and buttercream, playing with flavors becomes fun. I tried adding a layer of raspberry jam between the cake layers on my second attempt, and the tartness cut through the sweetness beautifully—especially if you're serving this after a big meal. Blueberry jam works just as well and looks stunning peeking through between layers. You could also infuse the buttercream itself by adding a teaspoon of almond extract or a tiny bit of lemon zest for subtle complexity, though galaxy cakes benefit from buttercream that doesn't fight with the vanilla.
Timing and Make-Ahead Strategy
The cake layers can be baked up to two days ahead and stored wrapped in plastic wrap at room temperature—this actually makes them easier to frost because they're not warm. The buttercream keeps in the fridge for a week, so you can tint and prepare it the day before. Assembly and decoration should happen the day of serving because the galaxy buttercream looks freshest and most vibrant on day one, though the finished cake stays beautiful in a cool room for up to eight hours. If you're making this for a morning graduation party, bake the night before and decorate early in the morning while it's still dark outside—somehow that timing feels thematic.
Decorating Without Stress
The most important thing I learned is that galaxy cakes are forgiving by nature because the whole aesthetic is supposed to look cosmic and a little chaotic. If your swirls don't blend perfectly, that's actually more authentic to how nebulae actually look. If your painted stars end up in odd places, call it artistic placement. The imperfections make it feel handmade and real, which is infinitely more charming than a perfectly smooth cake that took three hours to frost.
- Use an offset spatula with a light touch—you're guiding the buttercream, not sculpting it.
- If you don't have a splatter tool for stars, a fork works just as well when you tap it gently against your fingernail.
- Keep edible glitter or luster dust for the very end, applied just before serving so it catches the light at its shiniest.
 Save to Pinterest
 This cake transformed from an intimidating idea into one of my most favorite things to make, and watching it become the centerpiece of someone's celebration never gets old. Whether you're frosting it for a graduation, a birthday, or just because you want your kitchen to look like it contains edible art, this galaxy cake is absolutely worth the effort.
Common Questions
- → How do I achieve the galaxy color swirl effect?
Divide colored buttercream into multiple hues and combine them by gently rolling in plastic wrap before piping, creating the marbled galaxy look.
- → What is the best way to apply the edible stars?
Use a food-safe paintbrush or splatter tool dipped in white gel food coloring to flick tiny stars, then sprinkle gold and silver stars for sparkle.
- → Can I prepare the cake layers in advance?
Yes, bake layers ahead, cool completely, and wrap tightly before refrigerating to maintain freshness for later assembly.
- → What ingredients create the moist cake texture?
Combining softened butter, whole milk, and sugar creamed with eggs ensures a tender, moist crumb balanced with light vanilla flavor.
- → How to store the cake after decorating?
Keep the finished cake refrigerated in a covered container to maintain decoration and freshness for up to three days.